F & B Meal Periods
This is a Club Prophet Executive Report v4 – Power BI or PBI
Note: Samples are using demo data and do not reflect real world data.
/CPS Executive Reports v4 Power_3_thumb_0_225.png)
The F&B Meal Period report shows revenue broken down by General Ledger (GL) Description for the defined Meal Period Time.
-
DepartmentName: GL Account Description.
-
MealName = Defined Meal Name.
-
CustomerCount = Number of customer Sale transactions for the given Department Name and Meal Period.
-
SaleAmount = Sum of the Net Sales for the given Department Name and Meal Period.
-
DiscountAmount = Sum of the Discounts for the given Department Name and Meal Period.
-
SubTotal = Sum of the SubTotal (SaleAmount – Discount Amount) for the given Department Name and Meal Period.
-
Tax = Sum of the Tax for the given Department Name and Meal Period.
-
GrossSales = Sum of the Revenue (Sales+Tax) for the given Department Name and Meal Period.
-
MealPeriod = the assigned number for the given Sale Period – used for sorting.
FILTERS
There are various filters you can use to narrow down the data. Filters are the gold background controls as well as the Filters right hand sidebar.
Defining Meal Periods in CPS F&B
You can define Meal Periods in the Club Prophet F&B module as follows:
1. From the F&B main menu, click the Setting button. You may need admin privileges to get into settings.
2. Click Configuration | Meal Time.
3. From here you can Add, Edit or Delete the Meal Time information.
Note: The Meal Period number is used for sorting. So, think about your different meal periods and number accordingly. You might want to do something like:
-
Breakfast
-
Lunch
-
Happy Hour
-
Dinner
-
Late Night
The report will sort by the Meal Period Number (not alphabetically by name) so number accordingly. Other than that, you simply assign a Name and start and end time (careful not to overlap times with other Meal Periods) then click Save. The report will do the rest to break out your defined meal periods. Repeat this step for each Meal Period you want.
Tips
- Filters which are the gold back color controls on the report allow you to pick from a list. Hold down the Ctrl key on the keyboard to select multiple items.
- If you want to search for a particular value, use the filters in the right pane menu. They will have a search box in addition to a list of the items.
- Use the Advanced option in the right menu panel for advanced search options.
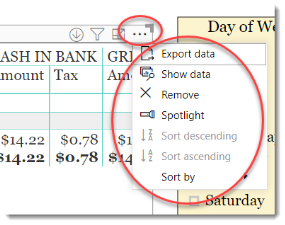
- Use the three dots […] in the top right of a visual for more options like Export data.
- Use the Help button to open the user guide for any given report
 .
.
/CPS Executive Reports v4 Power_4_thumb_0_225.png)
/CPS Executive Reports v4 Power_6_thumb_0_225.png)
/CPS Executive Reports v4 Power_7_thumb_0_225.png)
/CPS Executive Reports v4 Power_8_thumb_0_225.png)
